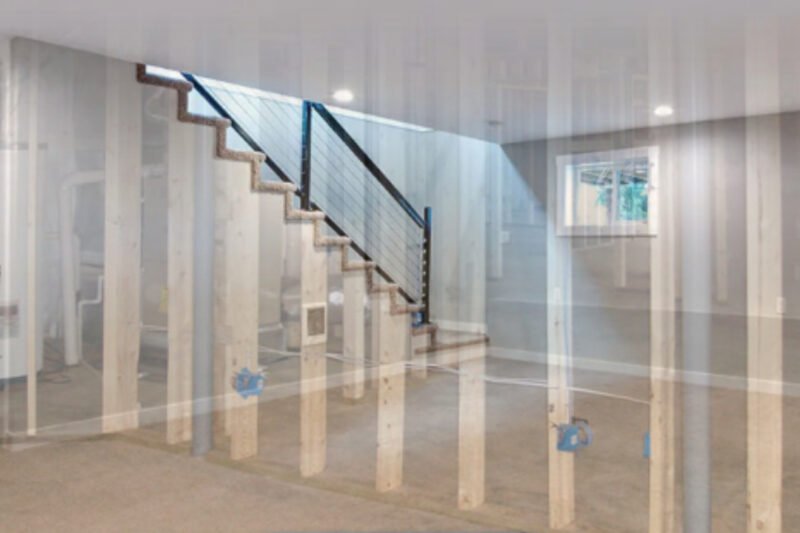
Although concrete flooring and walls may not scream potential at the moment, your basement offers a large amount of space that may be used for more than simply storage and can add significant value to your property. If a completed basement is on your home’s wish list, take the time to research what goes into the job and determine if a Basement Remodeling DIY approach is suitable for you.
Insulating the walls, selecting a floor, and installing a ceiling are the fundamental steps to transforming your basement into an additional living space. Are you prepared to start? Before commencing this project, you should evaluate all the procedures and calculate your budget.
What to Do Before Beginning Basement Renovations
Before you begin purchasing insulation and constructing walls for your basement remodeling, prepare the space for the investment by cleaning it out, verifying there are no active leaks, and confirming that the basement is up to code.
First, declutter your basement.

Before you begin any do-it-yourself job or hire professionals, you must clear your basement of all debris. Before beginning, remove all the boxes, bins, trash, and appliances.
Step 2: Conduct a Basement Moisture Test.
Before you redesign your basement, you should do a moisture test to determine if it needs to be waterproofed. In the absence of proper waterproofing, your basement remodeling could be damaged by leaks.
Here are some speedy techniques for waterproofing your basement:
- Redirect gutters away from your home’s foundation.
- Adjust the slope of your grass so that water is directed away from the basement.
- Utilize a water-resistant coating or paint on interior walls.
- Add a drain leading to the storm drain or a pit equipped with a sump pump.
- After addressing the leaking walls, retake the exam to ensure the problem has been resolved, and you will be ready to proceed.
Even if you do not have a problem with leaky walls, you should consider installing a layer of waterproofing membrane to the external cement walls before proceeding. This will aid in preventing future problems.
Step 3: Research Local Basement Building Permits and Building Codes
When you begin construction on your basement, you will be required to obtain the proper building permits. Before you do so, investigate local building codes to determine if there are ceiling height and escape requirements for your basement. If your basement does not match these criteria, you may need to reconsider a DIY basement finishing project.
Once you have determined that your basement complies with applicable codes, apply for the necessary permits and begin finishing your basement.
Step 4: Collect Materials and Equipment
Depending on the size of your project and the finishes you select, the number of materials necessary will vary. Before acquiring materials for your basement, perform a thorough measurement. Consider that insulation will be required for the walls and floor if you construct a subfloor. If desired, drywall can be used on the ceiling as well as the walls.
Methods for Completing Your Basement
How to Complete the Basement’s Walls
If the walls of your basement are made entirely of concrete, you should begin here. After the insulation is placed and the drywall is coated, the finished basement walls will not only make the space appear complete but also warm and inviting.
The following steps are required to finish your basement walls:
Install insulation first
- Adding polystyrene foam insulation directly to your foundation walls is one of the easiest and most effective ways to insulate the outer walls of a basement.
- To allow for wiggle space during installation, trim the foam pieces to the height of your ceiling minus 14 inches. Foam insulation can be cut using a utility knife or circular saw. If you use a saw, wear safety eyewear.
- Hold the insulation against the wall to guarantee the proper height. Remove once more before proceeding to the next step.
- Apply the glue to the wall where the foam will adhere in an S-shaped pattern. Allow resting for 30 seconds or the period specified on the bottle.
- Apply pressure to the sheet against the glue.
- Repeat the procedure until all walls are covered.
- After installing all of the foam, seal the gaps between each piece using duct tape.
- Caulk or foam fills any remaining gaps between the foam and the ceiling, floor, and corners.
- After the installation has been completed, you can frame your walls and add drywall.
Second Step: Frame Your Walls
Cut all your two-by-fours to the correct length before you begin creating your walls. Subtract the thickness of the top and bottom plates as well as an additional 1/4 inch for the vertical wall joists. This will provide sufficient space to easily fit the frames against the foundation.
For basement wall framing:
Install blocking between the overhead floor joists and the parallel walls by screwing or nailing a two-by-four to the joists. Install at 2-foot intervals along the parallel walls. These blocks will be used to attach your frames.
Draw a line along the length of each wall, 4 inches from the wall’s edge. Here is where you will align the frame’s exterior edge.
On the ground, assemble the wall with the bottom plate closest to the wall. Attach the wall joists to the top and bottom plates with a framing nailer every 16 inches. As required, move wall joists to accommodate doors and windows.
Align the outer border of the bottom plate with the 4-inch line as you raise the wall.
Use a masonry drill, masonry nails, and a hammer to secure the bottom plate to the concrete floor. This stage requires the use of hearing protection, a dust mask, and safety glasses.
Using your framing nailer and a stepladder, affix the top plate to the joists or blocks above. Before nailing the top plate, hold a level vertically against each wall joist as you proceed across the wall to confirm that the wall is laying flat. Insert a shim between the top plate and ceiling joists until the wall joists are level, and then attach it with the framing nailer.
If your basement does not enable you to build the wall on the ground and then tilt it up, or if you are completing the project alone, you can always place the top and bottom plates before securing the wall joists.
Installation of Drywall
After constructing your walls, you can begin installing drywall. Consider any outlets or valves by measuring their location and cutting access holes in the sheet of drywall with a drywall knife. After securing the piece of drywall to the wall, determine the window’s proportions and cut out the necessary form from the sheet.
You may choose to hang your drywall vertically or horizontally, though, for the majority of homes, horizontal hanging is the best option. Each panel will have fewer seams and be easier to complete.
To get started:
- Make sure each sheet of drywall ends on a stud by measuring and trimming as necessary with a utility knife.
- Using drywall screws and a drill, secure the drywall to each stud, taking care not to rip the drywall paper surface. Plaster shouldn’t be visible around the nail head.
- Caulk should be applied to joints and screw heads. Finally, cover seams with drywall tape before recaulking.
- Now that your basement walls are complete, you may paint them.
How to Complete a Basement Floor
After the basement walls have been completed, it is time to focus on finishing the basement floors. To prevent damage from the inevitable flood or leak that may occur in a basement, it is advisable to utilize waterproof materials for the flooring.
Step 1: Choose new flooring for your finished basement
Here are some popular choices for basement flooring:
You might select vinyl flooring that resembles wood planks. It is water-resistant and simple to install.
Tiles: Tiles are easy to clean in the event of a flood or leak and give your basement a polished appearance.
Carpet tiles are simple to install, and if water damage occurs, they can be simply removed, dried, and replaced at a low cost.
Learn how to install flooring and subflooring once you’ve selected the appropriate flooring for your basement renovation.
Step 2: Install Subflooring and Flooring
If the concrete subfloor is level and free of moisture, you can lay interlocking flooring right on top of it. However, it is preferable to construct a new subfloor using plywood and polystyrene sheets, or at the least, a moisture barrier must be installed.
Installing a new basement subfloor as the initial stage in basement floor finishing:
Apply sheets of polystyrene insulation using glue in the same manner as the wall insulation.
On top of the insulation, place sheets of plywood. Using a concrete drill and concrete screws, secure the new subfloor.
After laying the plywood, you can use it as a platform for installing nearly any type of flooring.
Next, according to the installation instructions appropriate to your flooring type. With the installation of flooring and drywall, your renovated basement should begin to take shape.
How to Complete the Basement Ceiling
To achieve a finished appearance in your basement, you’ll need to conceal the exposed wires, vents, and pipes on the ceiling while retaining access to them. Follow the instructions below to choose your materials and install your ceiling.
Step 1: Select a ceiling type
You can paint your basement ceiling to help conceal pipes and utilities while leaving them accessible, but installing a completed ceiling will give your refurbished basement a more finished appearance.
Two types of basement ceiling finishes can be installed:
- Drop-Ceiling: A drop-ceiling is a common, inexpensive, and simple alternative seen in many homes. It covers exposed pipes and floor joists while permitting access to overhead utilities.
- Drywall Ceiling: Drywall ceilings have a finished appearance, are better for space conservation, but require additional work to provide access to pipes and ducts.
If your ceiling is already a bit low, you can save more space by painting or installing drywall than by installing a drop ceiling.
Second Step: Install Your Ceiling
Installation of a tile ceiling requires a hammer, nails, wire, wire cutters, and an installation kit. From there, it is simply a matter of following the manufacturer’s instructions. With a drop ceiling, damaged tiles can be replaced as needed.
For a ceiling made of drywall, you will require a drywall jack or an extra pair of hands. Otherwise, you will follow a technique similar to completing your basement walls. Additionally, you must leave an access hole in the drywall for future pipe and ventilation access. Cover it with an air grate to complete its appearance.
Next: a completed basement
Once you’ve completed transforming your concrete basement into a completely functional lower level, you’ll need to decide how you’ll use and decorate the additional space.
If you’re considering a basement remodel in the Houston area and need help with the design, the Southern Belt firm can help! Contact our basement design Houston agency at (713) 900-0003 now and also refer to our site to find out What Is The Basement Remodeling Cost.
No Comments
Be the first to start a conversation